I’m baaack! I decided to leave my Indonesian teaching role for one in a relatively new school teaching Spanish. It was close (I could ride my bike to school), it was teaching a language I loved and it was time for a change! Unfortunately, it was not the right change for me. I didn’t blog all year as I was disheartened and felt so alone. Although most of the staff were lovely at my new school, we were very tightly micro-managed. The expectations were very high (unreasonable one could say!) and I battled with a language colleague who kept making the comment that I ‘was not a native speaker’.
I felt dismayed but not surprised when the prin informed me I would not be wanted in 2021.
BUT I managed to pick up a fantastic job close to the city of Melbourne in the lovely suburb of Albert Park. Our school (South Melbourne Park Primary School) is a heritage building in the Albert Park Lake area. Sometimes the swans leave the lake and graze outside classroom windows. It is surrounded by mature trees and bird sounds. Leadership is appreciative and supportive of the teachers. The team of specialist teachers is awesome! I am so happy there! Plus I get to teach ALL year levels from P – 6. It is quite a small school – just right!
So…I am rejuvenated and ready to blog again – but this time I will be blogging about my Spanish teaching, not my Indonesian teaching! All good- hopefully you will find something that is useful for you in your language classroom no matter what language you teach.
Here is a present for you for reading until the end! Click on this link and it will take you to a 50 minute presentation video that I made (for US audience) at the beginning of this year that will give you some new ideas for your teaching! Thanks for all your support. (This was the unedited version – sorry! Just speed it up in settings!!)
I loved Allison’s session! She was so energetic, zany and funny! It would be exciting being a student in her class. She showed us a very cute movie talk that she uses with her French students about Ormice, a pig that really wants some cookies. Allison told us to inform the students first that you will be pausing the video, then either pause and talk, or take screenshots and use those (easier than trying to pause in the correct spot!).
Allison likes to use bitmojos (available on Chrome) for rejoinder posters. See my examples below.
Allison also suggested using Simon’s Cat videos for movie talks, they are short and funny. Allison uses Quick time to cut out the beginning and end of videos, and v2mate.com to download videos from youtube. I tried v2mate but it didn’t work for me, I prefer to use KeepVid. She also suggested using Mr Bean videos and short clips from Birdbox Studios.
Allison teaches older students than what I do, but I still thought her ideas were relevant, especially for my Year 3s. She suggested using a personal inventory at the commencement of the school year to find out more about the students. This is a good way to begin a positive relationship with students, especially those with challenging behaviours. This week , my Year 2s (new classes as I did not have them last semester) made a name tag out of a piece of card (A4 folded in half) and wrote their name in large letters, then drew a picture of something or activity they really loved. They then sat on the floor with the name tags in front of them and we were able to have a discussion about their interests (in target language).
Allison showed us a great little clip called ‘Blues‘, and invited us to come up with some target structures for it. One of the things I love about Movie Talk is that it can be adapted for any level just by adjusting the level of complexity of vocabulary. For my younger students, I would use lihat (look), sedih/senang (sad/happy), ada (there is), burung (bird) bermain musik (play musik), foto (photo) and lampu (lamp). For more advanced students, you could add hujan (rain), nangis (crying), datang (arrive), buka/tutup (open/close) and jatuh (fall). For even more advanced students, you could talk about being depressed, discuss who the person is the photo is, how the weather affects mood, etc!
Allison also suggested some great follow-up activites/assessments for Movie Talk:
true/false quiz
match sentence to image
re-order events
blind retell in pairs (line A and line B, line B looks at screenshots on screen, line A faces back of room, B person talks about the pictures one at a time to person A.) Then swap.
Turn the Movie Talk into an reading/embedded reading, try using Edpuzzle.
close your eyes – hands in air if what I say is true, hands on head if what I say is false (this would be great for antsy kids)
make laminated screenshots of the story, or display them on their own device or Smartboard and record kids retelling story
HW activity – retell the video to someone at home
use Socrative (for older students) – questions with instant feedback for students!
use Playposit for embedding questions into your videos
have a Gallery Walk. Laminate each screenshot and place around room, provide paper at each picture. Students walk around and write commens for each picture.
Allison was very generous in sharing resources in this session. Thanks so much Allison! See Allison’s website for great ideas, resources and a useful blog. She also has available on her site the powerpoint that went with her presentation. Add it to your Google Drive for a great resource!
More great strategies from La Maestra! Whenever Annabelle uses the word ‘tetapi’ (but), all the students say ‘but’ in English. Great idea! For the word ‘buat’ (make/do), Annabelle moves her hands as if she is making a ball out of dough. I liked this gesture!
Annabelle also used the ‘chocolate’ brain break, which can easily be converted to Indonesian. (See my suka, suka blog post) But Annabelle uses fist pumps instead of claps.
Although I did not see the story that Annabelle presented to her class, she told us that on the first day with them, she asked for details, then on the next day she asked the students what the details were and typed the story in front of them, conveniently forgetting the details 😉
Another brain break! Annabelle asked them to stand up and they played a quick game of ‘Budi Berkata’ (Simon Says). She got them to do actions very quickly, and then suddenly said ‘Sit Down!’ Lots of them got out!! Very sneaky, Annabelle!
Another brain break – Annabelle shook each hand, each foot while counting to 8 each time. (Students copied). She then did the same thing while counting to 4, then 2, then said “rrrrrrrt” and everyone sat down. They breathed in and out a couple of times. Annabelle said “I’m waiting for 100%”
(The Spanish gesture for ‘vendio’ (sold) was similar to the Fortnite fanning out dollar signs, I thought it was cool, ignore this if not needed!
Sometimes Annabelle did the unicorn high 5. That is a weird unicorn noise plus touching of horns!
Annabelle played a cool game of Kahoot that did not require iPads. She gave out coloured red, yellow, green and blue cards. Instead of pressing that colour on the iPad, they held up each card.
When students called out ‘yellow! yellow! yellow!’ excitedly, Annabelle asked them, “Es yellow, yellow, yellow o amarillo?” Great way to revise these colours also. “Cual es? Rojo?” (Warna apa? Merah?)
Brain break – Students stand in a circle and Annabelle asks them to clap together, slowly, then get really fast. When they get fast, Annabelle goes into the middle of the circle and blows bubbles with her bubble wand! Genius!
Annabelle also played a game called ‘La Rana’ (The Frog). Students stand in a circle and close their eyes. La Maestra picks one student and obviously no-one knows who it is. Annabelle tells them to open their eyes and then they walk around the room in silence. (I do not know how this game progresses, if anyone knows, please tell me!!)
She also played “Zip Zap Zoom”. They pointed their hands together at a person and said “zip” to another person who says “zap”. (Help needed here too!)
She also played a great version of Rock, Paper, Scissors where players pair up and the loser of each game gets behind the winner (making a snake) and then the ‘snake’ goes to another snake to play with the winner. You should end up with two big snakes. The body of the snake chants the winners name (to keep them engaged and involved).
Annabelle told her class, “If you are not speaking Spanish I will probably not call on you and that is totally OK”. (I really need to say this to my students!!)
Annabelle played a great game called the Unicornio Malo.
She used this great ‘feisty pet’ prop. The characters in the game are the bad unicorn, Juan the good monster, the police person and the innocents (or maybe victims). Their is a great explanation of this game on Erica Peplinski‘s site, but I will try to explain anyway, as I personally found this game quite confusing and I think the more explanations the better! It was a little complicated but very, very cool game!!
Firstly, choose your characters. The class sits in a circle, on chairs and the teacher (all in target language) tells them to close their eyes, or go to sleep. Ask the class, “Is peeking a good idea?” The teacher walks around and says “I touch the shoulder” and does so, then she does the same for the monster and the police.
Check to see if the characters actually realise they have been tapped! Annabelle does this by saying “Wake up unicorn”. Practise sleeping and waking up with the class and tell them you can see who is good at this because you opened and closed your eyes quickly.
Even during this, Annabelle used a brain break! Stand up. Play Rock, Paper, Scissors with 3 different people. Sit back down. Go to sleep.
Ask the unicorn, “Who do you want to play tricks on?” They indicate someone.
Say to the good monster, “Wake up! Who do you want to save?” They indicate someone. Then tell them, “Sleep”. (The whole class have their eyes closed all this time!)
Polisi, wake up! Who do you think is the bad unicorn? They choose someone. Annabelle then told them if their chosen one is the bad unicorn or not (but I don’t know why she tells them this!!)
Now, put some scary music on – Annabelle used music from The Twilight Zone.
Then Annabelle spins her magic. “The bad unicorn went to a girl’s house. (She is describing the victim). The girl is wearing shorts. The bad unicorn went to a girl that has a little brother. Who has a brother?” Keep giving clues until the victim is guessed.
Annabelle continued the story, “The bad unicorn went into Jane’s (victims) house and did a poo in Jane’s mum’s bed! ” Jane leaves the circle and watches proceedings quietly. “The Polisi went to the house and the Polisi looked at the poo, smelt poo and said “The bad unicorn is ‘Harry’ (a random name). Is it a possibility. Polisi, you have 2 more guesses to accuse someone. Write on board “It is _________ because ______. Write down the 3 possibilities.
The class votes for who they think is the Bad Unicorn. Then the class chants, “Tell us, tell us” and the one who had the highest vote has to tell what they are. (NB They can lie!!)
Annabelle continues the story “Kelas, someone was attacked/tricked in the night. The Good Monster did not save ‘Susi’ “(bad unicorn)
Police again pick someone to be accused of trickery.
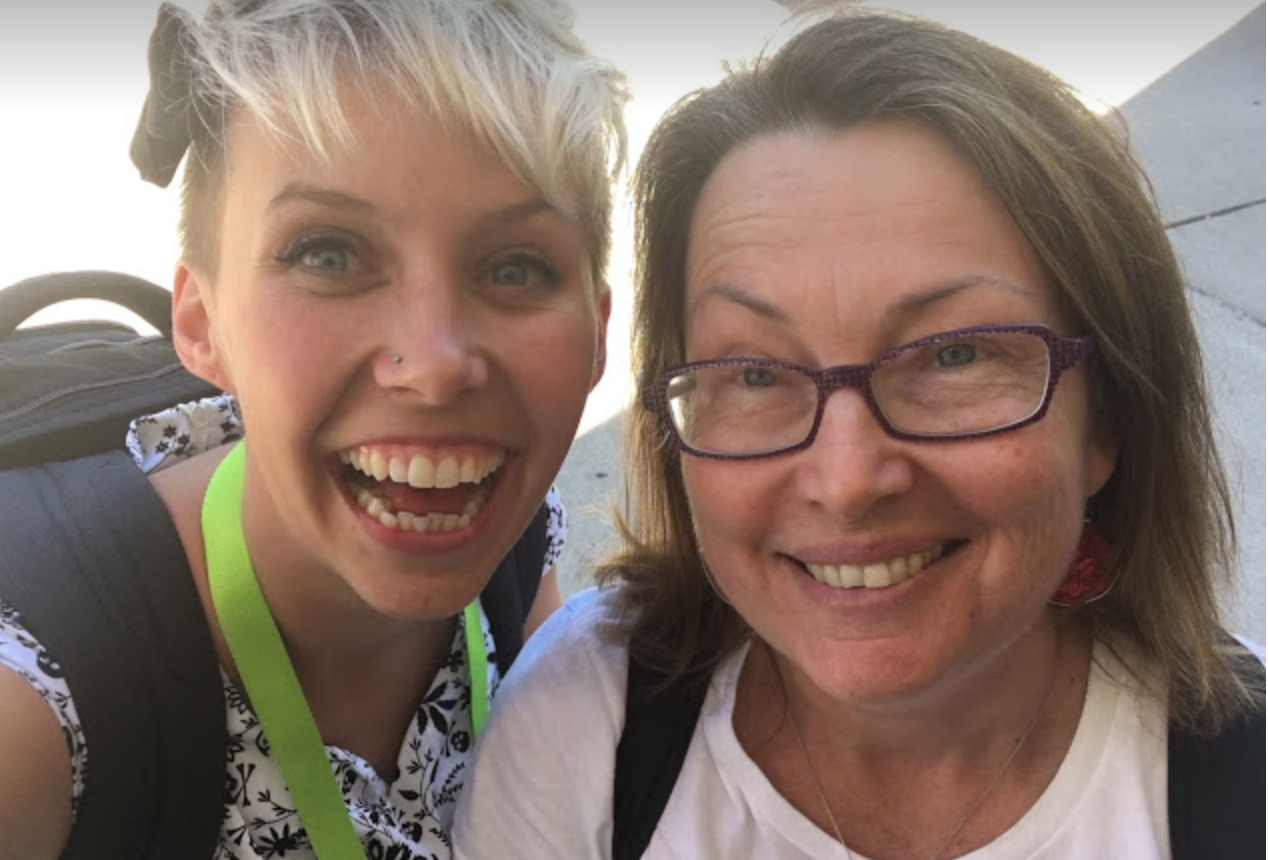
Oh , I was really looking forward to watching Annabelle Allen in action, and I was not disappointed! I learned so much from her and took copious notes (as well as a selfie!) of her sessions. I managed to catch three of her sessions overall. I hope these notes give you some idea of how Annabelle creates a wonderful community with her learners and manages to stay comprehensible by using a variety of strategies.
Annabelle told us she started off the first day all in Spanish. Her 20 learners (18 showed up) had all had Spanish before and were advanced beginners, except for four newbies. Annabelle starts by telling her students a bit about herself – where she lives, her family, her favourite things etc.
She also goes through Las Reglas (The Rules):
Repect – for me, for you , for everyone
Spanish, Spanish, no English!
Eyes, ears – participation!
and asks her new students to fill out a survey about themselves. Here is her free survey from Teachers pay Teachers. Annabelle takes photos of the students to use the next day in class. Because she now has a cool photo of the students, as well as information about what they like, she is able to create some cute photo + gif for a discussion the following day.
sidenote – Annabelle uses slidescarnival.com for her exciting powerpoints. She also recommends buying a personal microphone with speakers to save on the voice a bit. Hers were about $30 on Amazon.
EVERY time Annabelle said ‘hay una problema’, she also (along with the class) said “oh no, oh no, oh noooooo!” with the help of a little unicorn puppet.
Th first brainbreak I saw was a great one. She asked the students to quickly line up in 2 lines, then they played ‘Rock, Paper, Scissors’. They played very quickly. Then she said ‘Cambia!’ and the person on the end of one line moved to the other end and everybody moved down to a new partner. I tried this with all my Year 3s last week and it was brilliant!
One strategy to get 100% from her students was to write percentages down the side of the board, with 100% at the top and decreasing by ten percent to 10% at the bottom. She asked the students, “What amount of participation am I expecting? 10%? 20%? etc until of course everyone agreed Annabelle needed 100%!
Annabelle now only uses positive class points, there are no more points for teacher, just points when students are amazing. (Which they often are!) She gives LOTS of points! 13 points, 20 points, 10 points, lots!
Another brain break I saw was “Stand up. Jump 5 times. Do 5 jumping jacks. Close your eyes. Take a deep breath. Let it out. Sit down” Great for re-focusing.
Annabelle made comments about pictures of the students taken the previous day. She told them: ‘Aras had (she pointed with both thumbs behind her back to indicate past tense) a cat called Agua.
She asked the students “How to you say *** in Spanish?” then counted 1, 2, 3 before anyone could answer. Gave slower processors time to think about the answer. She asked the students to read the Spanish sentences in English, and gave them 20 points when they did a great job.
A chatty boy said something about a car, so instead of telling him to be quiet, she went straight to him and gave him the attention he wanted. She asked him what type of car he wanted, and then quickly looked up ‘Kiddle‘ (a safer option than Google) to find a picture of the car.
La Maestra was sooo patient and calm! When the class became unsettled, she asked them to make a circle then paired them up. They quickly played Rock, Paper, Scissors with their FEET!! Both feet together is rock, legs apart is paper, and one foot in front of another is scissors. It was great! I tried it with my older classes last week and they loved it! So good for restless boys!
Another time they got a bit antsy, Annabelle asked them to ‘forma una fila’ (make a line) from shortest to tallest, then they had to sit down in that order (great for splitting up friends without being obvious). Whoops! I forgot to mention that the students were all seated on chairs in a large semi-circle facing the front. She often used a rejoinder ‘Hola hola’ and class says ‘Coca Cola’. She also used an excellent ‘applauso de foca’ (seal clap) where kids had to clap from their elbows up to their hands! Very cute.
I loved the way Annabelle went from one engaging activity to the next. She used Google Earth, and focussed on a country one of her students was from. (South Korea). She zoomed in on a person on the map, and told the class it was her friend Bill!
She had a great way of getting students to use rejoinders such as ‘Aduh!’ (oh no!), ‘Astaga!’ (OMG) and Kasihan (Poor little sausage). She had certain students in charge of the rejoinder and have them under their chairs, then whenever it was appropriate the kids took them out and held them up.
Then she told them about Carlos the crocodile eating all her paper. When one of the boys kept saying ‘Woof woof’ unnecessarily, she said ‘Got it? Are you with me?’ and did not correct him overtly. (Like I would have, shame on me!!)
Then she handed out papers and said “When I pass these out, you are going to think about what you are going to do. Are you going to talk? You can get a lot of points here.” She reminded them about appropriate behaviour and made them want to do the right thing!
Annabelle likes to use weird noised to keep attention, like ‘whoop, whoop’ and ‘brrrrrt’. Use your imagination! I tried some but some kids imitated me! Guess they get used to it, or maybe I needed to use ‘the look’.
She also did some Fortnite dances as a brain break. Wish I could remember exactly how she did this, but I did notice one boy stand up and start to do the ‘floss’. (Ask a student!) She asked him to come and teach her, and she deliberately made her dancing really bad, so the class was very amused!
Another brain break was, ‘Forma 2 filas! Toca (touch) el mano, el pied (hands, feet, etc) so pairs had to touch those parts together. Hands to hands, foot to foot etc. Another cute brainbreak in the target language.
I also loved “I am speaking English because…” and they all said “You’re the teacher!” Have tried this out too!
Annabelle used LOTS of brain breaks – LOTS! More than you think she would need. Try it!
She then moved into Movie Talk. The rules for movie talk were:
Shhhhh. Don’t say anything if you’ve seen it already.
Don’t complain. (I will be pausing every 2 seconds)
Bryce told us that we should give our students lots of opportunities to read. Use FVR (Free Voluntary Reading) time. Start this slowly, with 3 minutes at first, gradually building up to 10 minutes. More advanced students may want to read for even longer! Read your current class story , then change it a little each lesson and read embedded versions of the story, or read a parallel story and compare it with the original.
Bryce suggests that if you are using a class novel (more advanced students), then first locate the essential structures. These are what you need to teach before starting with the novel. Pre-teach the Super 7 and structures that will be repeated throughout.
Post Story/Chapter Activities:
Bryce gives his students points depending on how they respond to the story – if they state a fact, they receive 2 points, if they listen and respond (to the fact) they get 5 points and if they ask a question they get 5 points.
Read the story – in pairs, on their own (with a worksheet to complete) or reading club with the teacher.
Independent readers can write comprehension questions about the story, co-operative groups could read on their own and then make a book map or some other group project.
Popcorn Reading
Translate line-by-line
comic strip retell
wanted poster for main character
create a text conversation between two characters
From Reading to Assessment
The following can be used as assessment:
parallel read with questions (in English)
cold read with questions (in English)
Bloom’s type questions may be used for older students
Reconnect with the Real World
do simple science experiments
presiden Joko selfies (with black velvet peci)
infographic (how many students have a dog, cat, etc)
make sure authentic resources are interesting and not frustrating to read
adapt materials to rebus style (using pictures in place of words)
A good way to start the year is by folding a little card of A5 and asking kids to write their name on it and a picture of something they like, or something they did on their holiday. Then you can Circle with Balls Ben Slavic Circling with Balls
Or you can start the year with Bryce Hedstrom’s KLB (Special Person) Special Person
Use stories to increase the input. You can tell a story, ask a story or listen to a (familiar) story. Use silly stories! Find a resource that inspires (eg the news story about the 12 soccer boys being trapped in the cave in Thailand), build a story from an image or a story based on the Super 7, a personal experience or on a familiar folktale/story that students would already know (Goldilocks).
Don’t limit yourself to picture talks! Use pictures from National Geographic, do map talks (cari Sumatra, warnai laut biru – find Sumatra, colour the sea blue) and recipe talks. Use follow-up activities to add input, such as a Round-the-World quiz (students move to different parts of the classroom) where students write their answers in different spots around the room. Or put lots of laminated pictures in the middle of a circle and anyone who wants to picks up a picture and says something about it. (You cannot repeat what has already been said) This is called ‘Circle the Wagon’.
Transition well: give classroom jobs, have students up and moving, emphasise the connection between what you are doing and why, have everything set up and ready to go and vary the types of input you use.
Get grades in the gradebook: use exit tickets (5 quick questions), quick writes, compare/contrast, venn diagram, what’s your opinion/why? (for upper levels, or use emojis)
Use a related video to stretch out your story: Jurassic Fart, BHD Cactus Bank. Make predictions, but with younger students give them options eg Is he going to run, or is he going to eat? Continue to use previous structures and add new ones as needed. Take screenshots of your video. Put all of these up on the Smartboard, or print and laminate all the slides. Use the ‘gutter’ (spaces between the pictures) to make up stuff about the places, characters, etc that are not obvious. Manipulate the students to get them to remember difficult words (this is a Year 5 word so you guys probably won’t be able to remember it). Use 5 main pictures for retelling.
To do this, use Powerpoint. Insert different shapes, then select shape fill, then picture. Ask your students to retell the story. Share a picture of the slide to their iPads, or ask them to take a photo. Then they tell the story to a face (a stuffed animal face, a picture of someone), then to a friend, then to the teacher.
I have wanted to attend this annual conference for a while, but hesitated due to the expense. The US-based conference is aimed at helping teachers teach for proficiency using CI-based strategies (See iFLT for more details). When Bu Cathy expressed an interest in going as well, I decided that 2018 was going to be the year for iFLT. I was more than ready!
Coaching for Coaches
Encouraged by Bu Cathy, I decided to also attend the Coaching for Coaches workshop held on the Monday before the main 4 day conference. I am so glad I did! It was a small group, so we had a chance to take the roles of coach, teacher, student and observer. What a great way to encourage and nuture up-coming CI teachers! I loved the quote one of the presenters (Michelle Kindt and Terri Wiechart) showed us “Comparison is the thief of joy” (Theodore Roosevelt). A great reminder not to compare ourselves with other teachers, we all have our own style of teaching and we are all great! I also loved “People who aren’t smiling are the ones who need a smile the most”, a reminder that CI teaching is not only teaching to the eyes, but teaching to the heart.
CARDINAL RULES OF COACHING (to be added)
The teacher must feel safe
Discussion must be carefully directed by the coach
The focus is on the skill, not the language
The experience must empower the teacher
These are the steps we followed while we were coaching:
Go through the rules with the participants
Set up chairs and positions for students, observers, teacher and coach.
Explain to the teacher how the activity works, asking them about the age group and experience of the ‘students’ and the skill they are wanting to focus on.
Give them time to write up language structures on the whiteboard while you as coach explain the roles of ‘students’ and ‘observers’.
Ask the teacher how much time they want, and time them. Tell them they may stop at any time.
Guide the discussion, asking the teacher, ‘students’ and ‘observers’ how the teacher made them feel part of the classroom community and how the teacher kept it comprehensible. Don’t forget to ‘feed forward’ and well as feed back! (How would you continue this lesson? Where would you go next with this?) If anyone gets off task, tell them, “We don’t have time!”
This is a fantastic hands-on CI activity to teach the words ‘ambil’ (pick up), ‘taruh’ (put), ‘di atas’ (on top of), colours and numbers. Students are totally engaged because each has their own little snap-lock bag with all nine unifix cube colours – white, blue, red, pink, brown, green, yellow, black and orange. At the beginning of the year I only included 5 colours and slowly added more over the year. I do this activity with Preps, but it would work with other beginners.
I start with asking all students to ‘lingkaran, lingkaran’ and make a circle shape with my hands. They get it, and sit in a circle. Then I say laki-laki, perempuan, laki-laki, perempuan (boy, girl, boy, girl – makes behaviour management so much easier!) – they sort themselves out (mostly). I sit in the circle too, usually next to the most challenging student 😉
Then I give out the ‘tas’ (bag) by sliding them across the carpet to each child. This seems to impress them no end! I show them what I do with mine – I tip them all out in front of me and then say ‘tas di belakang’, while placing bag behind my back.
After they have all done this, I count the ‘balok‘ one by one and get them to join in if they can. I tell them ‘Ambil merah. Taruh merah sini. Ambil putih. Taruh putih di atas merah. Ambil kuning. Taruh kuning di atas putih. (To be honest, with my Preps I don’t use ‘taruh‘ in case it is too much new vocab, I just leave it out, but you could use it) I say this slowly, and I do it as well, so that if a child does not know the colours yet, they can just copy me and let the language soak in. I do this with all colours, then start at the bottom and repeat each colour while pointing to each block.
Then we sing, ‘rusak, rusak, rusak – rusak, rusak, rusak’ as we break them all apart. Then I ask ‘Siapa duduk baik?’ (Who is sitting nicely?) and I pick that person to pick/say the colour we will start the next tower with. Sometimes they say it in English, that’s OK. I just repeat the colour and pick that block up. I pick a different child to say each block. All up we build about 5 or 6 towers, following the same routine and choosing children to say the next colour. Amazingly they don’t get bored!
With one class, I had an Indonesian child who kept saying ‘Sudah!’ after he had broken up his tower, so I incorporated this into the lesson and I said it as well, over and over, every time I finished breaking up my tower. If the kids said ‘Done!’ I said, you have to say ‘Sudah!’ which they did. By the last tower they were all chanting ‘Sudah! Sudah!’
When I have had enough, I line all my blocks up and count them, to make sure they are all there. They do it with me. Then I ask them to ‘ambil tas’ (pick up your bag) and we put them in one by one, listening to the colours I say aloud. I tell them ‘Tutup tas’ and they zip up their little bag. I walk around the circle and collect all the bags, saying ‘Terima kasih‘ to each child.
Such a cool activity and they are as good as gold because their hands are busy!
Then I hand them out a ‘tower building worksheet, which has six towers of six blocks each. I will add the attachment so you can download it and use with your own classes. (just give me time to get to school tomorrow to find it!)
I tell them we are going to colour in towers just the same way we built them, from the bottom up, and then I say ‘Warnai balok satu merah’ (colour in block 1 red), ‘Di atas, merah, warnai biru’ (on top of red, colour blue) etc. They enjoy this and you can see straight away who has got it and who hasn’t.
Try this with your younger students! They will love it and so will you! It’s fun to sit on the floor and play.
PS I have lots of plastic dinosaurs, cats and dogs too. It would be fun to create a little story where dinosaur walks to red, runs to yellow, jumps to blue etc or goes to orange with dog etc! Please add any other ideas you think of!
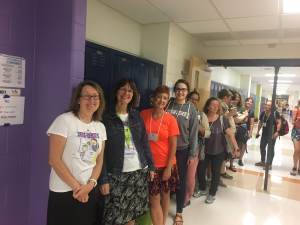
PPS Thanks to Bu Cathy who found these photos of me with my students ‘playing’ with blocks.
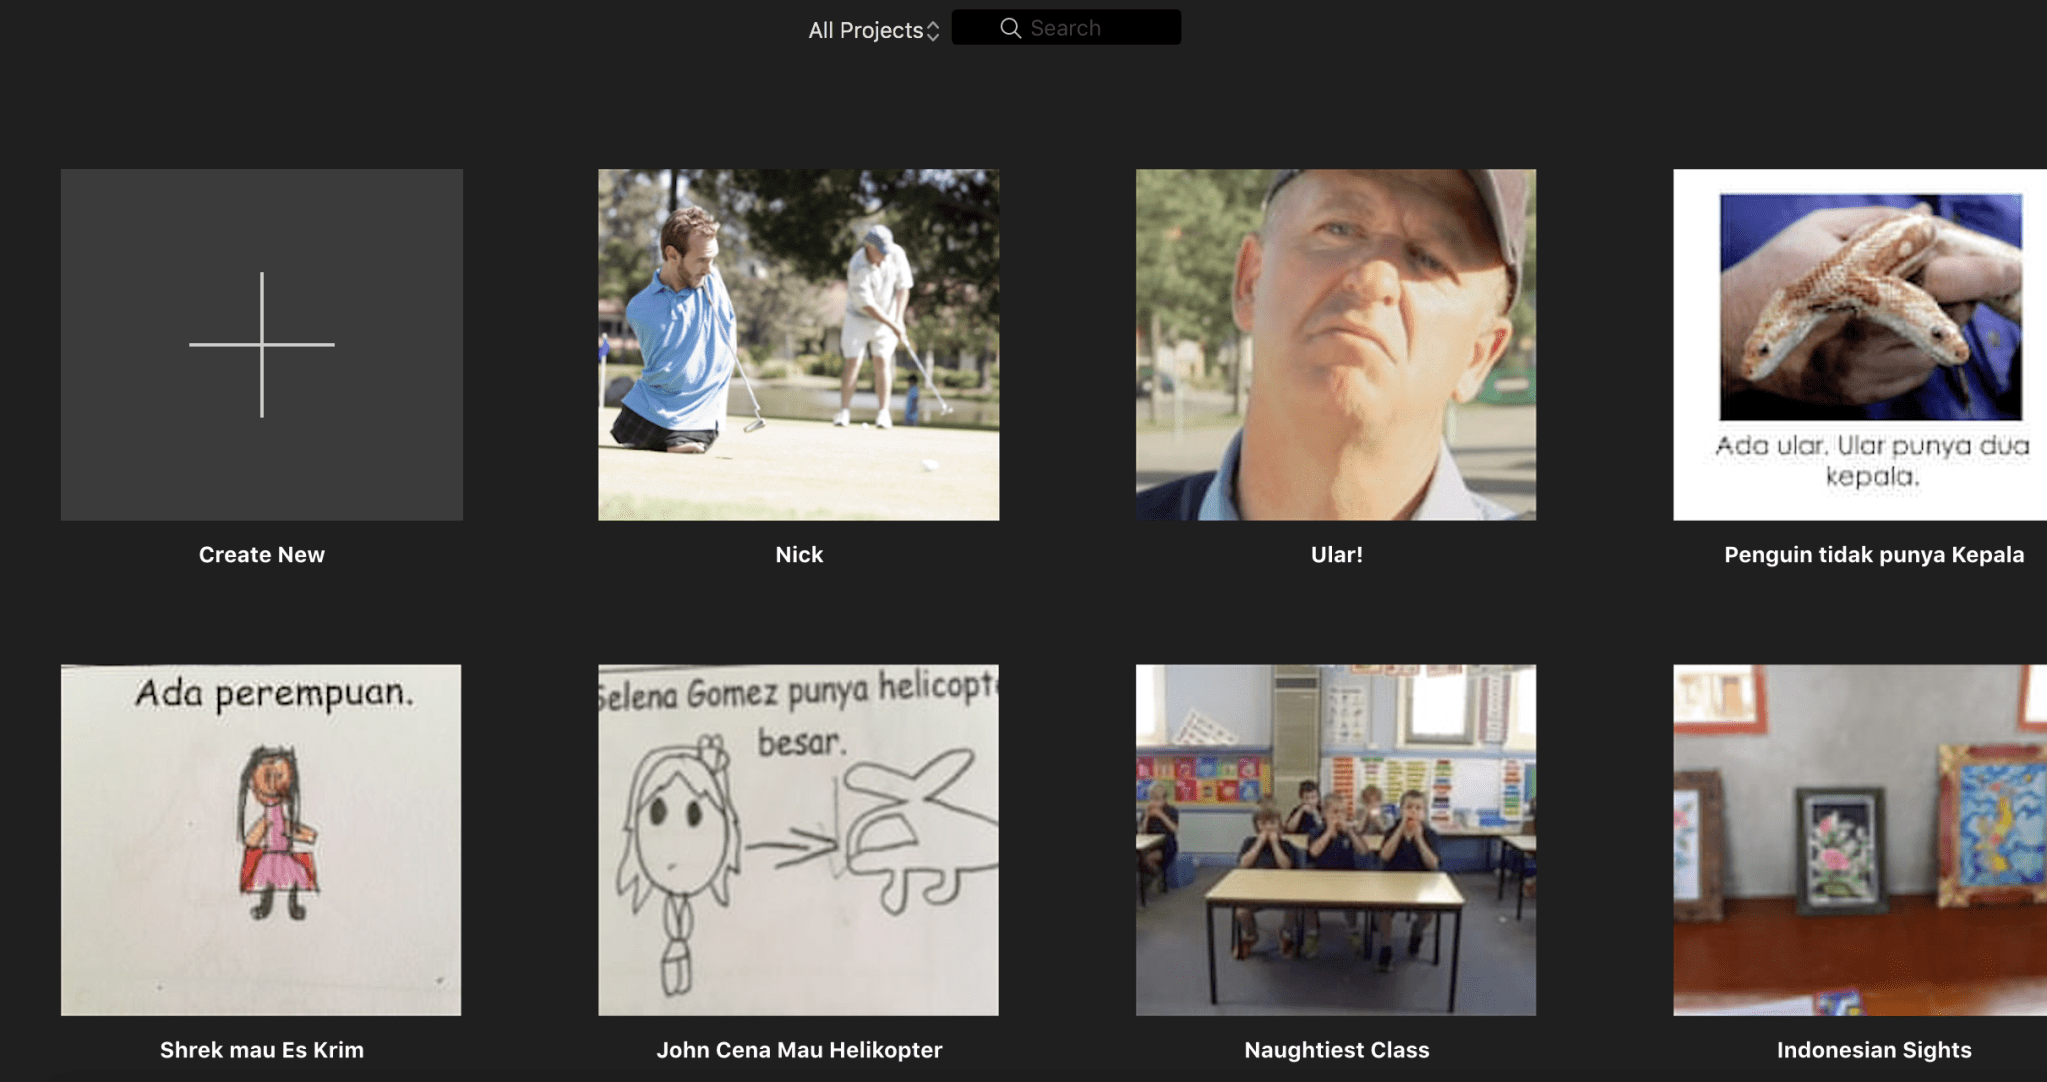
For a while now I have been making movies to enable my students to have some Indonesian input outside of class. I also use them in class as an introduction to a topic (‘Ular’ – you can see this movie on my YouTube channel, link provided below), at the end of a topic to pose a question/reflection (see ‘Nick’) or just to provide an additional five minutes of input if I am exhausted or need a couple of minutes to pack up!
I used to spend hours making a movie, but hopefully these little tips will make it easier and much faster for you to make your first movies!
I make movies in two ways – one is by using a story already made in Powerpoint, and secondly by uploading photos or videos into iMovie and then adding audio to either method.
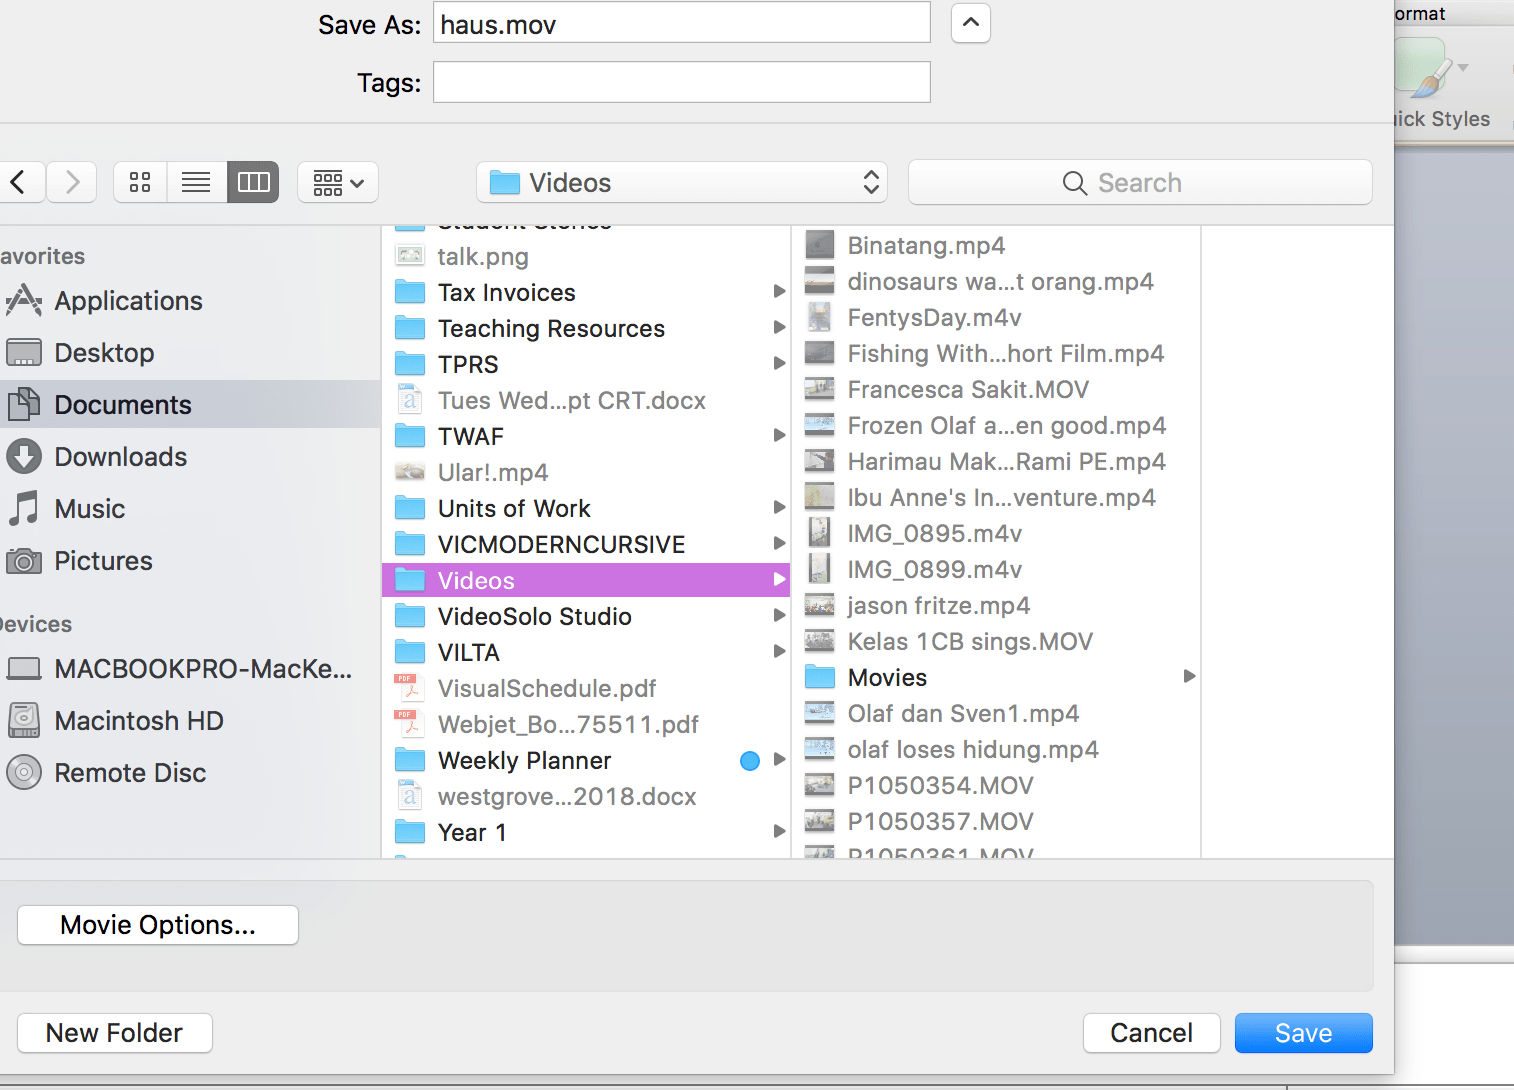
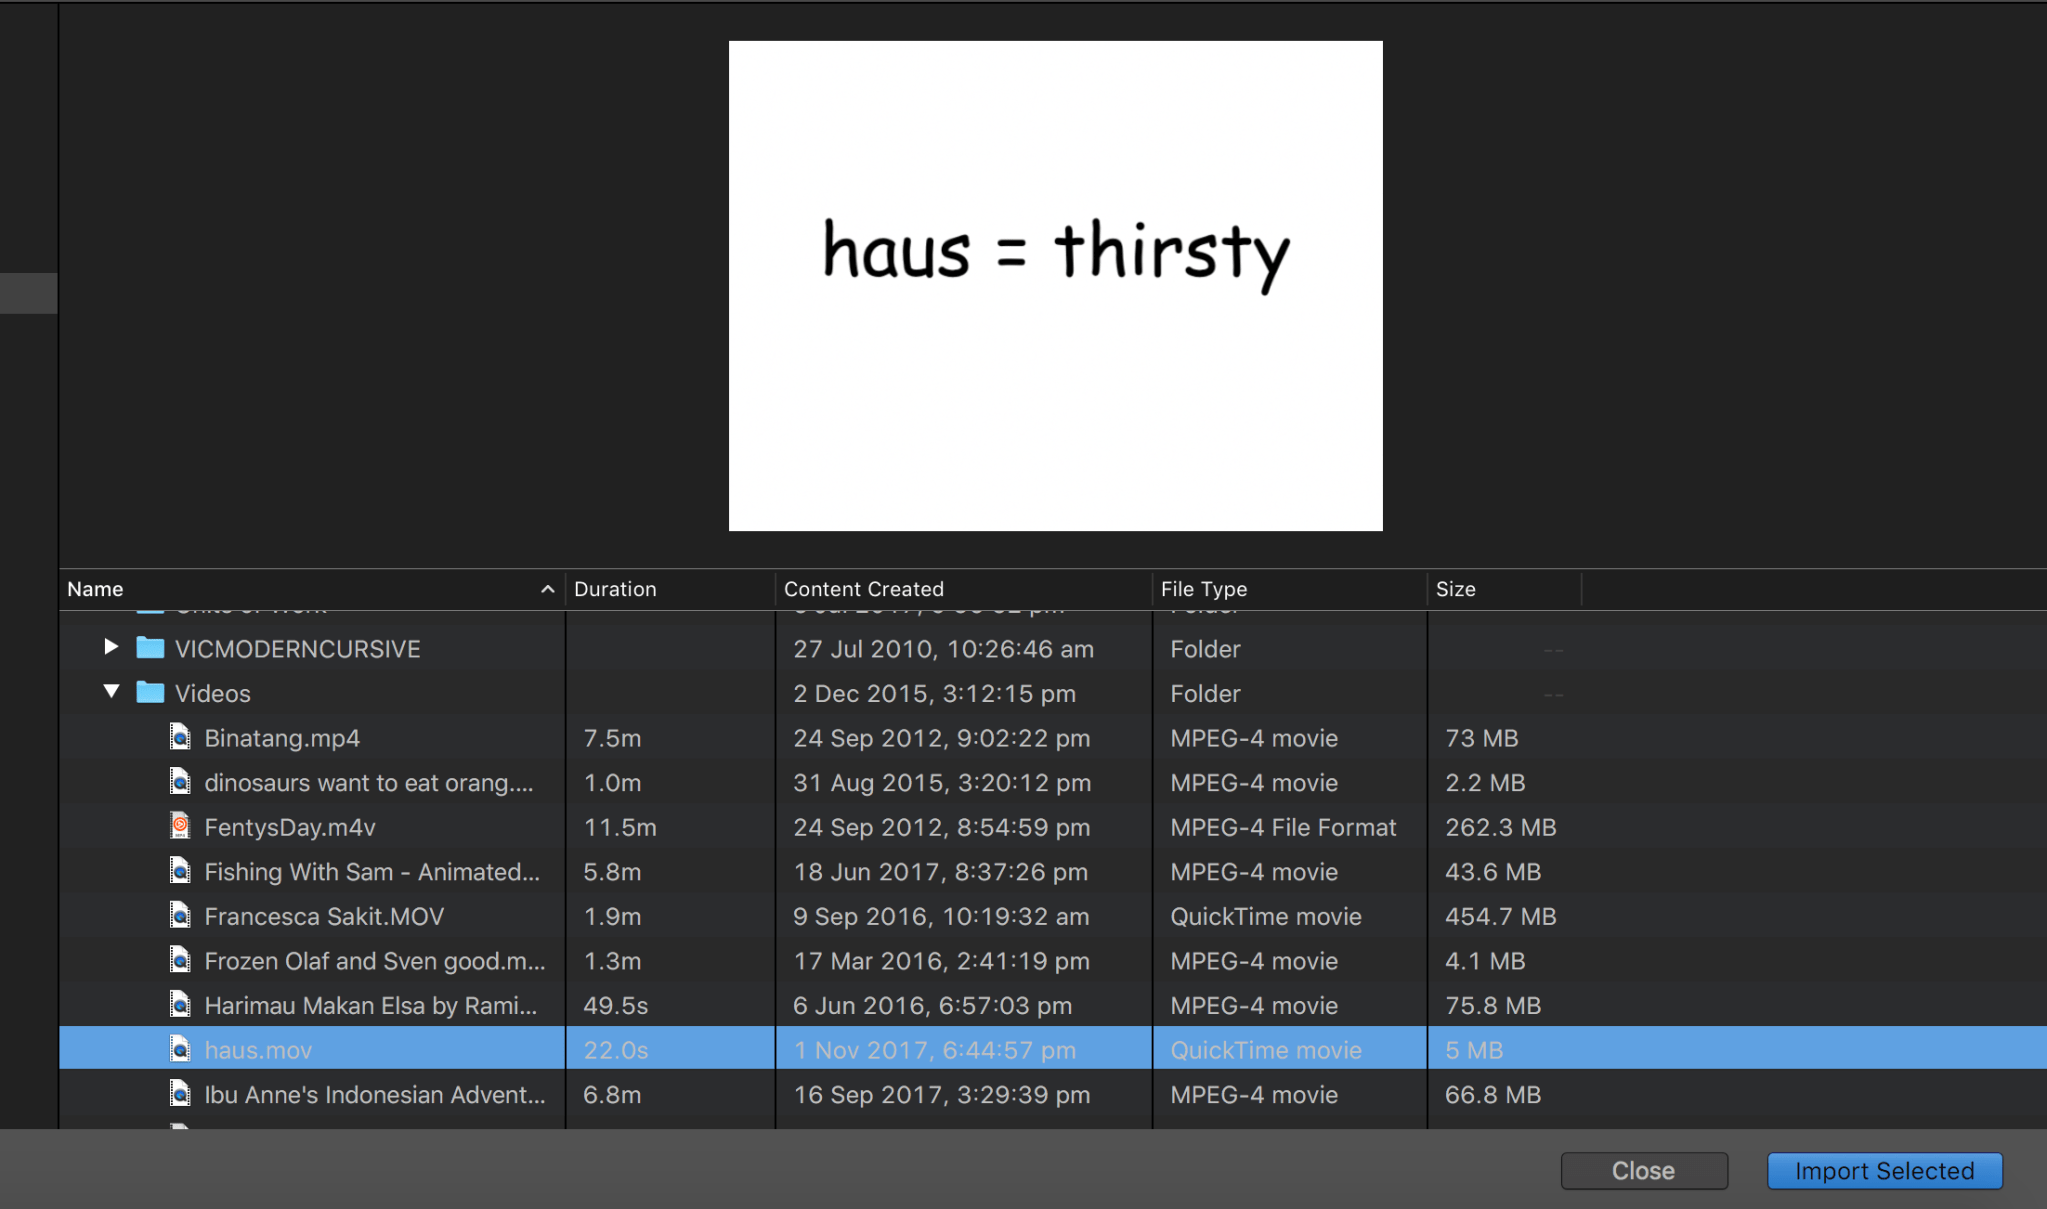
Let’s imagine you have a great story opened up in Powerpoint, such as my example ‘haus’. Click on file, then ‘Save as Movie’. (What a great option!!! Does all the hard work for you!)
Choose where you want your movie saved. I suggest you create a new folder called ‘Videos’.
Save the movie, then close Powerpoint, no longer needed!
Open iMovie.
Click on ‘Create New’, then ‘Import Media’. If you are making a movie with photos/videos, this is the stage you need to import them!
Your movie is in your new Video folder, remember? Click on it, and select ‘Import Selected’.
So far, so good!
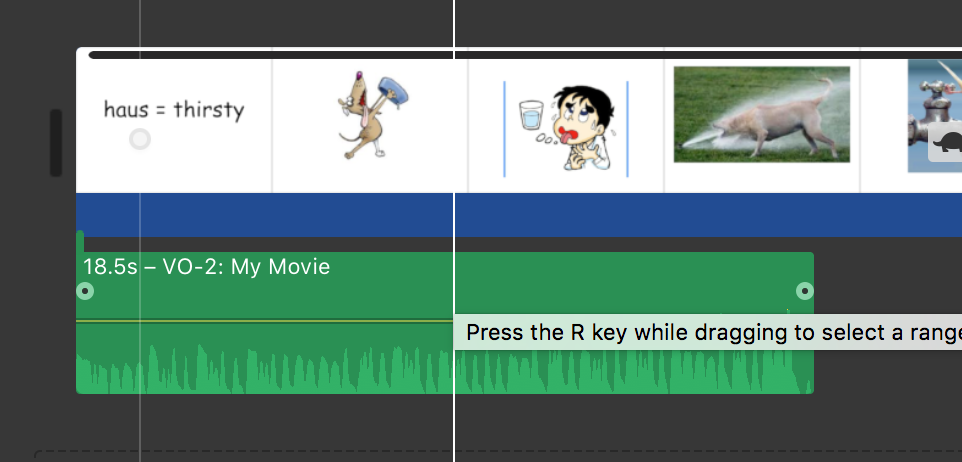
Now if you click on that little tiny video dated 6 June 2016 as seen above, it will have a yellow border around it. Once it has that, you drag it down to the bottom where indicated. You have to do this in order to manipulate your movie.
It is at this stage that I think you need to have a quick look at an imovie tutorial, especially if you have never used it before. Here is a link to one I found with a Google search, but there are lots that would be useful:
There are, however, three fantastic tools in imovie that I must mention! Sometimes I need to slow things right down to give me time to say what I want to say in the audio. Plus I discovered a fantastic little tool to make my Powerpoints fit properly into imovie!! The third is very important if you have finished recording your video but not happy with the volume. Sooo easy to fix, my teenage son showed me!
Tip 1. This one is very important if you are exporting from Powerpoint.
See that funny little square shape I have highlighted with the ‘loupe’? If you click on that, then select ‘fit’, your powerpoints will fit into the movie format and you won’t have the text cut off! (Grrr, the hours I spent fiddling with text to try and make it fit, if only I had known about this little tool!)
Tip 2. Check out the little tool that looks like a speedometer. It lets you control the speed of your movie. If you click on that, you can speed your movie up or slow it down by 10%, 25%, 50% or custom speed – very, very handy. Bu Cathy’s movie ‘Penguin Tidak Punya Kepala’, which can be seen on my youtube channel, Indonesian Fun for Juniors, has three or four different speeds. I had to do that because there were differences in the amount of text on each page and I needed different amounts of time to read it. I was able to split the movie clip, select one section, and select the speed I wanted, then do the same for another section of movie.
Tip 3. If you have recorded your voice but it sounds a bit soft, you do not have to record it all over again! I do not use an external microphone for recording, just the in-built mike in my laptop. But I always increase the volume by right clicking and dragging that yellow line you can see in the middle of the audio clip upwards. I usually increase it to about 200%. That works for me.
Recording Audio
Now we have a great movie and text but no audio! If you have found a video with sound, but want to record your voice over it, don’t worry too much. Imovie will automatically reduce the original audio volume as you record. You can reduce it further, though, but that might be another blog!
So, to record yourself speaking, click on the little microphone. A red dot will appear. DO NOT PANIC! You are not recording yet, it is just letting you know it is ready!
Now click that red dot. Three numbers will magically appear to count down until you are ready for blast off! Too easy, right? If you don’t like it, delete and start over again.
When you are ready to save your movie, go to File, but don’t expect to see ‘Save’! You will need to select ‘Share’. I always select YouTube and then my movies are automatically saved right where I want them to be. But I also select ‘File’ and then they are saved to a folder of my choosing as well, just in case I need a backup.
I really hope this blog has been useful and that it is easy to follow. I could also make it into a powerpoint and then convert into an imovie, so let me know if this format does not work for you! If you have any questions, I will be happy to help out if I can. I just jumped in and had a go and experimented along the way. I would love to see your finished products!
I usually blog when I am so excited about how well my lessons have gone. Today that is not the case. Today I felt like I was pushing a giant concrete block up a hill! I felt flat, and I was pushing myself to be engaging and fun. Why is it that when the teacher is not 100% for whatever reason, the little tackers pick up on that and run with it?!!
It seemed like classroom management was more difficult. It seemed like they were not doing their bit. It seemed like they were not getting it. My first class was with Year Three. They had seven minutes of reading time. So far, so good. All seemed very engaged and read for the whole time. Perhaps three or four of them were looking around and not really engaged in their text (stories written by other students).
Then came writing time. Usually I have one that does not write. Today there were three or four! Including one boy who wrote a great story last time! Just refused to write! Another started in Indonesian then trailed off into English (despite this being a no-no). I read their stories this afternoon and was so disappointed. What went wrong? I thought the writing would be so much better by this time of year! I thought they would be dying to write after being inspired by their classmates.
Then came my two prep classes. J decided to really play up. When I mentioned that his behaviour was not up to scratch, and that I would have to let his parents know when report time comes around, he said ‘Don’t even think about it’. I said if he was rude I would have to tell his teacher. He told me to shut up. He then proceeded to tell the students around him (who were telling him to behave) to shut up. He punched one and kicked one in the knee. I had to ring his teacher to remove him. We were all a bit shaken up after that. I thought after he had left, and because we had the wonderful snake eating up students, it would be a great, engaging lesson. Instead, I struggled to keep them quiet and listening. Then the headache from hell kicked in!
The next Prep class would be good, I thought, we haven’t been upset by J’s behaviour. But although it was better than the last class, it still felt like hard work instead of fun.
Last lesson was Year One. We began the snake story. The snake ate some kids. Then we did it again with different kids. Aha! This is more like it! By now the headache from hell had really kicked in and I was praying for the day to end.
What happened? Did we not have enough action? Should I have used more brain breaks? Were they picking up on my ‘flat’ mood? Why was the writing not as good as expected? Should I just resign and be done with it?!!
I guess the lesson is that we all have bad days. I hope you can relate to this post. As Scarlett O’Hara said, “Tomorrow is another day”. Let me know if you have had a similar day! I will be going to bed early with my new book ‘While we’re on the Topic’ by Bill Van Patten.


 To do this, use Powerpoint. Insert different shapes, then select shape fill, then picture. Ask your students to retell the story. Share a picture of the slide to their iPads, or ask them to take a photo. Then they tell the story to a face (a stuffed animal face, a picture of someone), then to a friend, then to the teacher.