
For a while now I have been making movies to enable my students to have some Indonesian input outside of class. I also use them in class as an introduction to a topic (‘Ular’ – you can see this movie on my YouTube channel, link provided below), at the end of a topic to pose a question/reflection (see ‘Nick’) or just to provide an additional five minutes of input if I am exhausted or need a couple of minutes to pack up!
I used to spend hours making a movie, but hopefully these little tips will make it easier and much faster for you to make your first movies!
I make movies in two ways – one is by using a story already made in Powerpoint, and secondly by uploading photos or videos into iMovie and then adding audio to either method.
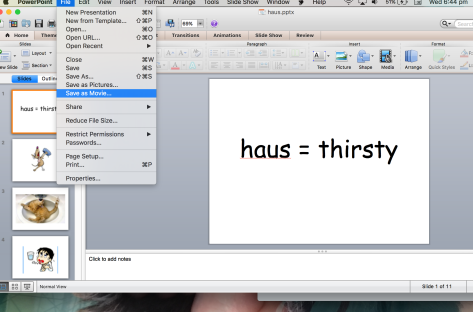
Let’s imagine you have a great story opened up in Powerpoint, such as my example ‘haus’. Click on file, then ‘Save as Movie’. (What a great option!!! Does all the hard work for you!)
Choose where you want your movie saved. I suggest you create a new folder called ‘Videos’.
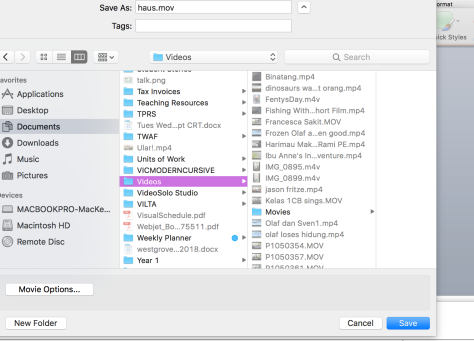
Save the movie, then close Powerpoint, no longer needed!
Open iMovie.
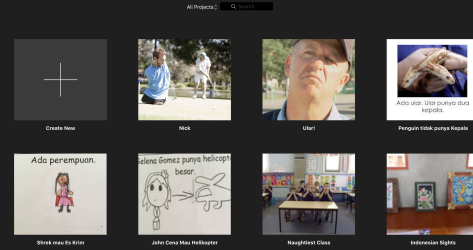
Click on ‘Create New’, then ‘Import Media’. If you are making a movie with photos/videos, this is the stage you need to import them!

Your movie is in your new Video folder, remember? Click on it, and select ‘Import Selected’.
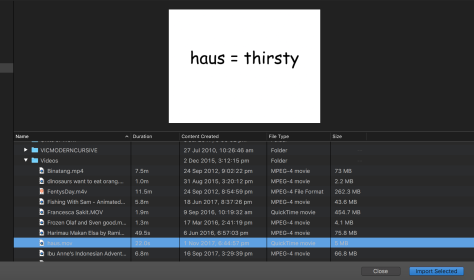
So far, so good!
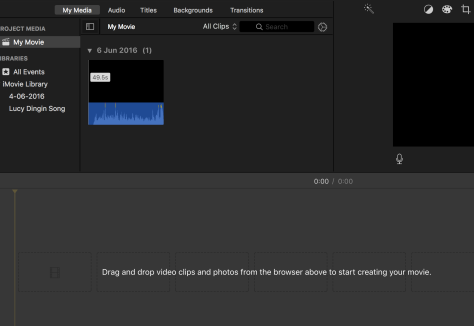
Now if you click on that little tiny video dated 6 June 2016 as seen above, it will have a yellow border around it. Once it has that, you drag it down to the bottom where indicated. You have to do this in order to manipulate your movie.
It is at this stage that I think you need to have a quick look at an imovie tutorial, especially if you have never used it before. Here is a link to one I found with a Google search, but there are lots that would be useful:
There are, however, three fantastic tools in imovie that I must mention! Sometimes I need to slow things right down to give me time to say what I want to say in the audio. Plus I discovered a fantastic little tool to make my Powerpoints fit properly into imovie!! The third is very important if you have finished recording your video but not happy with the volume. Sooo easy to fix, my teenage son showed me!
Tip 1. This one is very important if you are exporting from Powerpoint.
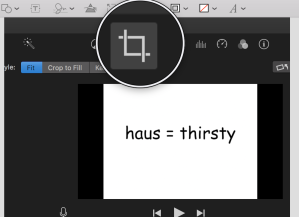
See that funny little square shape I have highlighted with the ‘loupe’? If you click on that, then select ‘fit’, your powerpoints will fit into the movie format and you won’t have the text cut off! (Grrr, the hours I spent fiddling with text to try and make it fit, if only I had known about this little tool!)
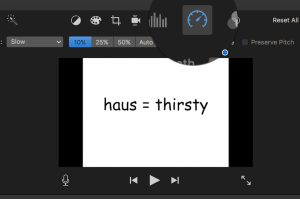
Tip 2. Check out the little tool that looks like a speedometer. It lets you control the speed of your movie. If you click on that, you can speed your movie up or slow it down by 10%, 25%, 50% or custom speed – very, very handy. Bu Cathy’s movie ‘Penguin Tidak Punya Kepala’, which can be seen on my youtube channel, Indonesian Fun for Juniors, has three or four different speeds. I had to do that because there were differences in the amount of text on each page and I needed different amounts of time to read it. I was able to split the movie clip, select one section, and select the speed I wanted, then do the same for another section of movie.
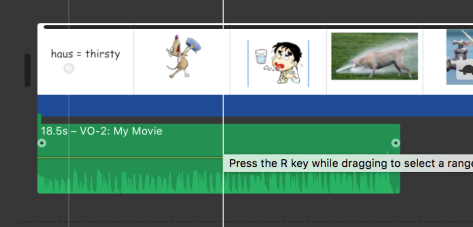
Tip 3. If you have recorded your voice but it sounds a bit soft, you do not have to record it all over again! I do not use an external microphone for recording, just the in-built mike in my laptop. But I always increase the volume by right clicking and dragging that yellow line you can see in the middle of the audio clip upwards. I usually increase it to about 200%. That works for me.
Recording Audio
Now we have a great movie and text but no audio! If you have found a video with sound, but want to record your voice over it, don’t worry too much. Imovie will automatically reduce the original audio volume as you record. You can reduce it further, though, but that might be another blog!
So, to record yourself speaking, click on the little microphone. A red dot will appear. DO NOT PANIC! You are not recording yet, it is just letting you know it is ready!


Now click that red dot. Three numbers will magically appear to count down until you are ready for blast off! Too easy, right? If you don’t like it, delete and start over again.
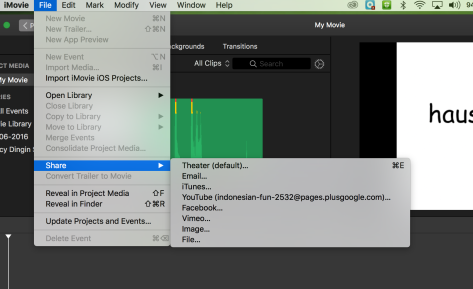
When you are ready to save your movie, go to File, but don’t expect to see ‘Save’! You will need to select ‘Share’. I always select YouTube and then my movies are automatically saved right where I want them to be. But I also select ‘File’ and then they are saved to a folder of my choosing as well, just in case I need a backup.
I really hope this blog has been useful and that it is easy to follow. I could also make it into a powerpoint and then convert into an imovie, so let me know if this format does not work for you! If you have any questions, I will be happy to help out if I can. I just jumped in and had a go and experimented along the way. I would love to see your finished products!

Smartphone headphones, with the microphone built into the lead, are great for recording on laptops. They are designed to capture voice and block out background noise so work well – plus they’re so common it saves buying a separate mic.
LikeLiked by 1 person
Great idea! Thanks.
LikeLike
Great tutorial post Bu Anne! I also want to start making some time (ha!) to play around with iMovie. I’ve played around with a few movie apps on my phone but really need to experiment more on my MacBook. Thanks for sharing! 🙂
LikeLiked by 1 person
Very clever Bu Anne! I use book creator app. You can’t do as much stuff but you can add sound and then export as a video reasonably quickly.
LikeLike
This looks really complicated to me but I am going to attempt to do this tonight! Need to think of my next topic first, and powerpoint. Thanks Anne!
LikeLike